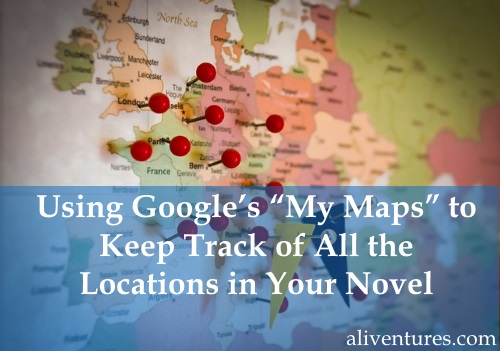
Using Google’s “My Maps” to Keep Track of All the Locations in Your Novel
I’ve got a particularly bad writing habit – and I suspect I’m not the only person who does this…
All too often, I leap straight into the next scene with very little thought about where exactly my characters are located.
If I was writing something focused on a single place (neighbours in a small town, friends at school) then this might make sense. But in my Lycopolis trilogy, my characters are scattered across the UK. Often, they need to journey from one place to another … and in drafting the novels, I tend to simply ignore the finer details of where exactly everyone lives and how they get from A to B.
(I’ll admit that geography isn’t my strongest point in real life, either: if I’m going anywhere new, I tend to look at a map every 30 seconds, and even then, I often take a wrong turn…)
My lovely and longsuffering editor, Lorna Fergusson, often has to pull me up on this – reminding me that readers will want to know what road a character is driving down, or where a particular house is located.
And she’s absolutely right.
The best tool I’ve found for keeping track of everything is Google’s “My Maps”. This is really handy for not only pinning down points on the map, but also for checking driving (or walking or cycling) distances and times between different places.
Note: Obviously, this won’t help you if you’re making up a location (whether that’s a fictional town in the real world, like Sophie Hannah does with Culver Valley in her crime thriller series, or an entire fantasy world).
When to Create Your Map
Ideally, you’ll want to start on your map during the planning stage or once you begin drafting. This way, you can put locations on as they come up: and you might want to allow the first 5 – 10 minutes of each writing session for planning the scene and for working out the details, so you don’t end up interrupting the flow of your writing.
But even if you end up creating your map long after the first – or second, or third – draft, that’s okay! I’ve been crystallising some of the locations in Lycopolis and Oblivion recently, and both of those have been out for a while now. I’ve only been making minor changes – a phrase here, a sentence there – but even a few little details like this can be helpful for readers who want to picture things.
How to Create a Custom Map in Google Maps
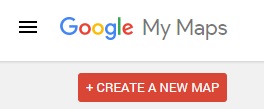
Step #1: Go to My Maps and sign in with your Google account.
Step #2: Click “Create a New Map”:
Step #3: Find the location of a particular place (e.g. your protagonist’s home) – you can use the map just like Google Maps, so you can either zoom in, type in the name of a town, or type in a postcode to find a particular location.
Click the place marker icon (indicated in red below) if it’s not already selected.
Note: To toggle back to dragging the map around, click the hand icon.
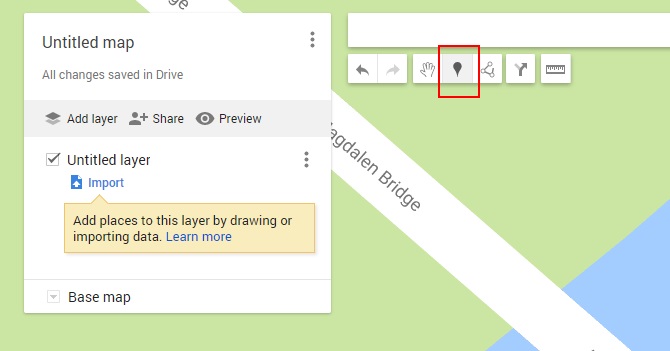
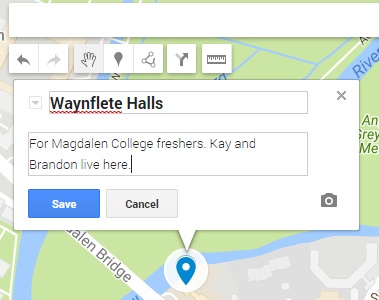
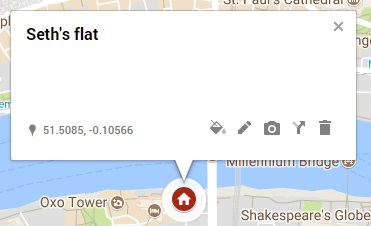
Step #4: Click where you want to put a marker. The blue marker will appear, and a box will pop up where you can enter a name for the location and a description.
Step #5: If you want, you can style the point icon: click on it again, then select the Style button (it looks like a paint bucket tipping up). You can choose a colour and/or a different icon:

Step #6: Next, add more points from your novel:
Step #7: Once you’ve got two (or more) points onto the map, you can create a “layer” that has directions from one to the other. This is very useful if you want to know how long it’ll take a character to drive from A to B, or if you want to plot their route via public transport.
Go to one of your points, then click the little arrow button (indicated in red below):
![]()
A new layer will pop up over on the left hand side:
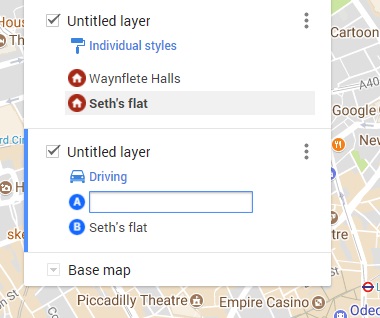
Step #8: Enter the starting point (if you start typing the name you gave it on your map, or any words from the description, it’ll appear – click on it to enter it).
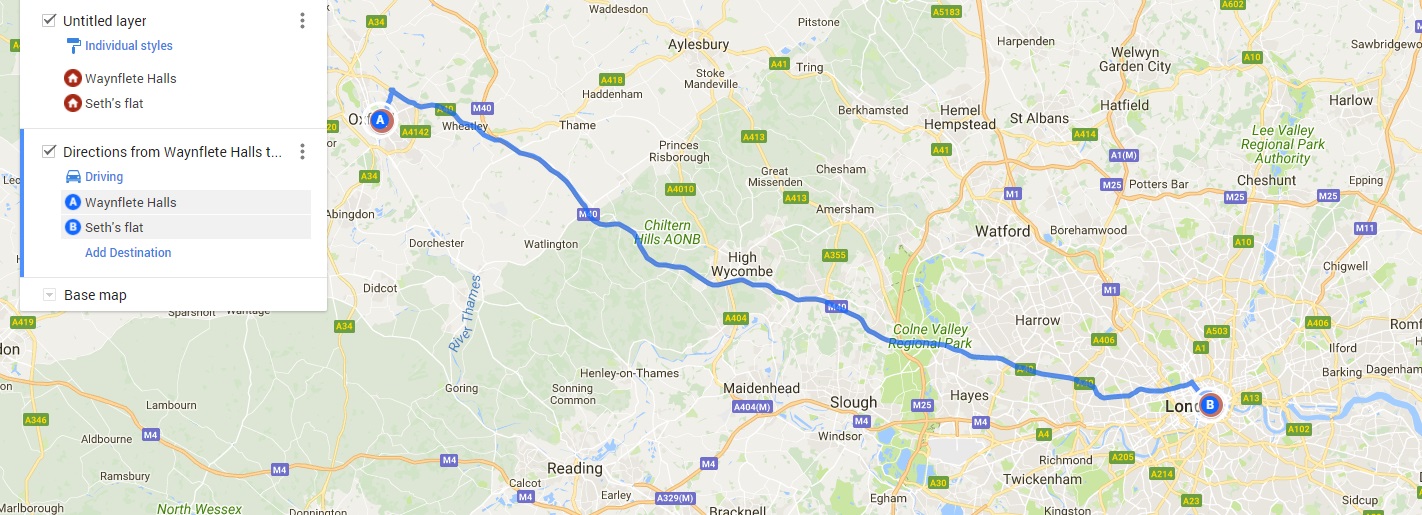
The map will now show a line from A to B, using the default of “Driving”:
Step #9: If you click on the three dots to the left of the Directions box then “Step by step directions”, you can see the distance and time for the journey as well as the detailed instructions:
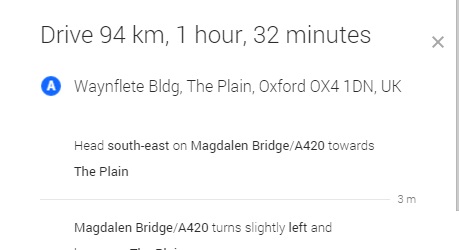
You can also change the transportation method, by clicking where it says “Driving” – you can only switch to “walking” or “cycling” though (rather than public transport as in the main Google Maps) – so if you want public transport directions, you’ll need to use regular Google Maps and enter your points again.
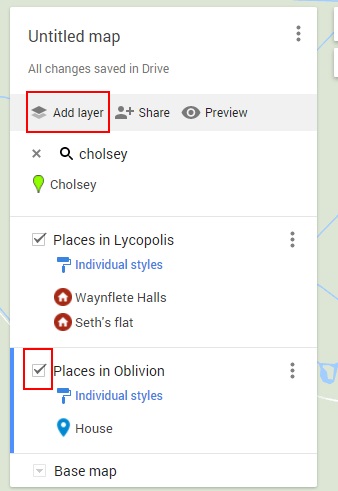
Step #10: If you have several novels in a series, you may want to create a separate layer for each book (just click the “Add Layer” button on the left-hand side). You can hide any given layer by unticking its box:
And that’s it! You may find it takes a few minutes to get the hang of My Maps, as it works slightly differently from Google Maps … but it’s well worth persevering with.
I’ve found My Maps a very handy way to keep all the details of my novels’ locations in one place, and to plot routes and distances between them. If you’ve not used it before, give it a go.
If you use a different tool that helps you sort out the locations in your novel, or if you’ve got a tip for My Maps, do share it with us in the comments below.
About

I’m Ali Luke, and I live in Leeds in the UK with my husband and two children.
Aliventures is where I help you master the art, craft and business of writing.
Start Here
If you're new, welcome! These posts are good ones to start with:
Can You Call Yourself a “Writer” if You’re Not Currently Writing?
The Three Stages of Editing (and Nine Handy Do-it-Yourself Tips)
My Novels
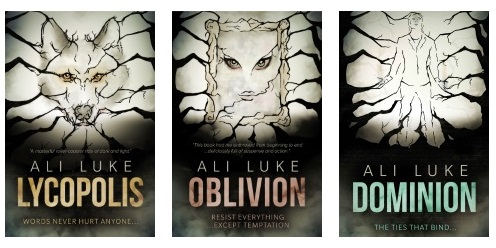
My contemporary fantasy trilogy is available from Amazon. The books follow on from one another, so read Lycopolis first.
You can buy them all from Amazon, or read them FREE in Kindle Unlimited.
Hello Ali,
Google maps is a great tool to find and locate your destinations. I usually using it while I am traveling to the other states and cities. But I am not so aware of these great features. Thanks for bringing up these simple tricks of using Google maps. I am sure going to try these outs.
Enjoy your day 🙂
Vishwajeet
Vishwajeet Kumar’s last blog post ..Dumb Things Bloggers Do!
Thanks! Yes, I use Google Maps a lot just for navigating around. 🙂